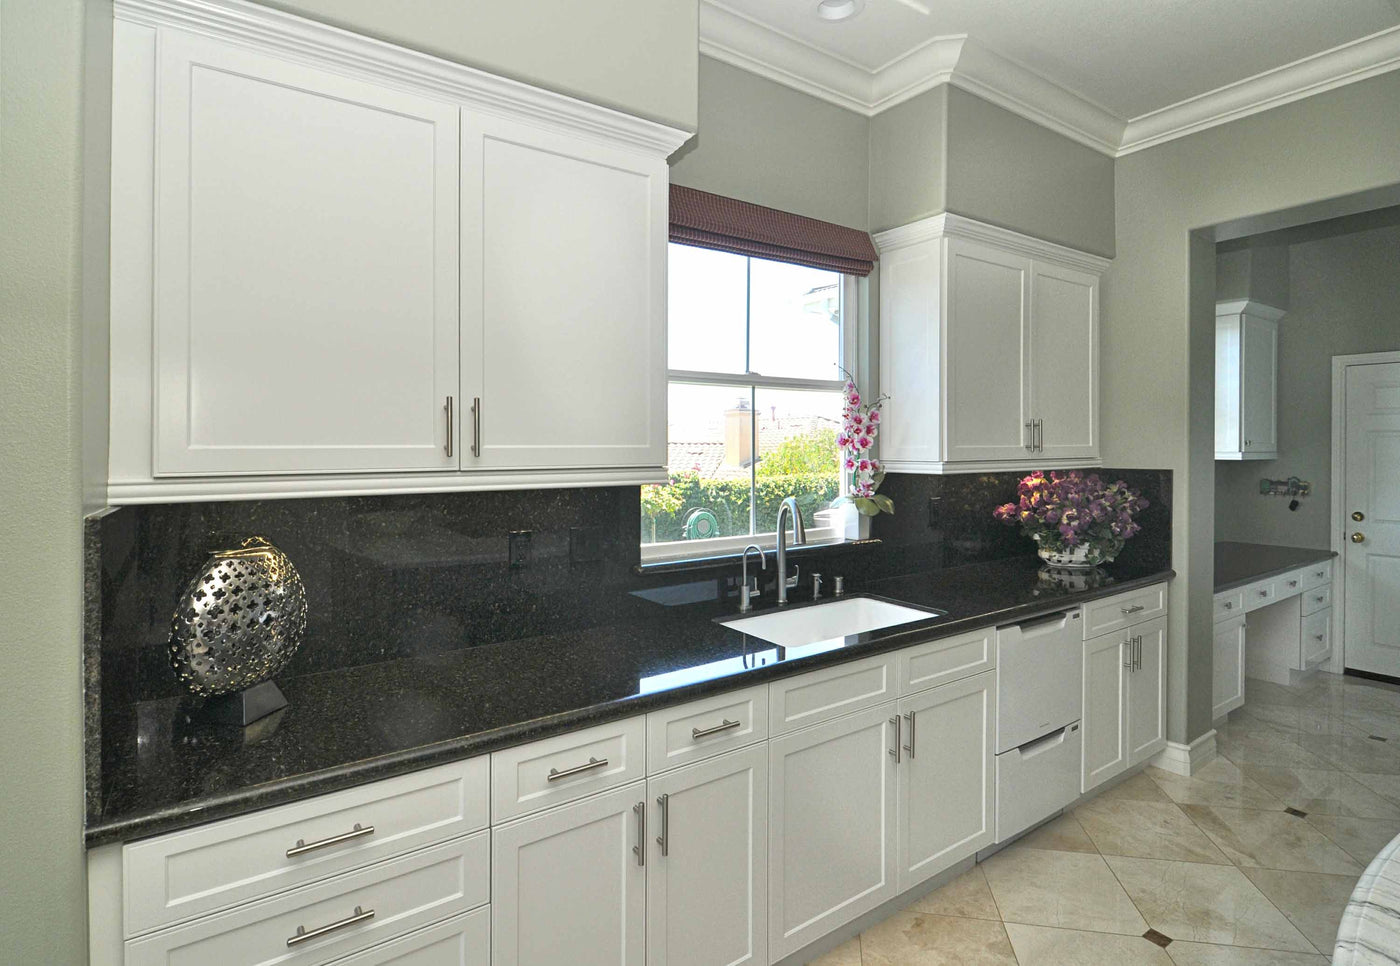
Cabinet Doors 'N' More now offers 48' W x 96' H 3D Laminate Thermofoil Veneer Sheets with a non-adhesive phenolic back. This product is a suitable option for cabinet refacing, and you can use it on cabinet face frames and end panels. We use the same type of thermofoil material for our cabinet doors and drawer fronts. It's available in four finishes: White, Antique White, Stone Grey and Smoke Grey. These finishes will match your cabinetry and other kitchen elements perfectly!
The non-adhesive phenolic backing provides a barrier between the thermofoil and the glue. We think it's best to use contact cement to apply the product to your cabinetry. While 3D Laminate is excellent for inside use, we don't recommend using it outside. Explore the qualities of thermofoil and discover how to reface your cabinets with this time-saving, economical material.

WHAT IS THERMOFOIL?
Thermofoil is a vinyl laminate sheet made of synthetic materials you can press onto particleboard or compressed wood. We heat and pressurize this thermofoil laminate sheet onto a core made of medium-density fiberboard (MDF). Homeowners often use this material to save money on the price of remodeling their kitchen. Since it can last up to a decade, you may want to use it if you have a starter home and want to update your cabinets' appearance.
Even though it has the word "foil" in its name, it doesn't contain any metal. Instead, thermofoil features vinyl that we vacuum-press into a thin layer. You can typically install this material on an MDF surface. This material is more compatible with MDF than laminate is. You can choose thermofoil in various colors to completely transform the look of your kitchen cabinetry.
WHAT DOES IT MEAN TO REFACE YOUR CABINETS?
Cabinet refacing is the process of replacing all cabinet doors and drawer fronts and then applying a new wood veneer or 3D laminate finish to all exposed parts, including cabinet frames and end panels. Refacing your cabinets allows you to update your kitchen's look without replacing anything. Instead of ordering all new cabinets for your kitchen, you can reface your cabinets. Cabinet refacing saves a lot of money, labor and time. Most cabinet refacing projects can be completed in 2-5 days.
This quick, simple process involves covering the cabinet face frame with the thermofoil laminate sheet while leaving the structural components intact. At this point, you can also replace the hardware on the old drawer fronts and doors. You can also use these parts again with a fresh coat of paint and cleaning. This process saves you time and money on a kitchen remodel, especially since it's easy to do it yourself.

BENEFITS OF LAMINATE THERMOFOIL SHEETS FOR CABINETS
Refacing your cabinetry with laminate thermofoil sheets is an excellent way to improve your kitchen's look. There are many benefits to cabinet refacing, including:
-
It saves you money: Cabinet refacing is about 30-50% cheaper than what you'd spend on new cabinets, tear-out and installation. In most cases, your cabinets are in good condition, so you don't need to tear them down and throw them away. If you're happy with the layout of your kitchen but just want a new look and feel, then cabinet refacing can be a great low-cost solution.
-
It's less complicated: A full kitchen remodel is considered a "major" remodeling job, with higher costs and long installation times of about four to six weeks. Most people also don't realize their kitchen becomes non-usable while they're getting their cabinets replaced. Countertops are ripped out, the sink is pulled out and appliances might have to be turned off, so you can't use your kitchen for weeks or even months. By refacing your cabinets instead of installing new ones, you can continue to prepare meals and gather with your family.
-
There are plenty of kitchen cabinet styles: There is a huge selection available when choosing cabinet refacing materials — real wood options like maple or cherry in different stains and lower-cost materials like laminate or thermofoil doors. You can also get drawer fronts in numerous designs and styles. If you have a kitchen island, consider making your cabinets a different color to create a contrast in the design.
-
You have other design opportunities: Deciding to reface your cabinets and save money opens up other possibilities to update your kitchen. New countertops and a sink, maybe a new faucet, possibly new flooring or even something as small as new cabinet hardware can make an impact on your new kitchen. With more money to spend on your kitchen remodeling project, you can splurge on the things that matter to you.
-
It's better for the environment: If you replace your cabinets, even though they might be in good condition, they'll most likely end up in a dump or landfill. By replacing just your cabinet doors and drawer fronts, you'll have a lot fewer materials to throw away. In some cases, these parts can be recycled for other areas of your house.
WHEN TO REFACE YOUR KITCHEN CABINETS
Refacing your cabinets can save you the time and money you would've spent replacing them. You may want to reface your cabinetry for the following reasons:
-
You like your kitchen’s layout: If your kitchen’s layout is working for you, you can reface the cabinetry to give it a whole new look. Consider whether you're comfortable cooking food and storing supplies in your existing kitchen. If you want to move your cabinets around or get more space, you should replace your cabinetry altogether.
-
Your cabinets are in excellent condition: Inspect your cabinets to make sure everything is in working order. Run your hand along the surfaces and look for cracks, dents and gaps. You could repair the surfaces, but they need to be smooth. Make sure the hinges, drawer tracks, internal storage structures and shelves are also in working condition. You’ll need to replace your cabinets if any of these pieces are broken.
-
You only want to change their appearance: Refacing your cabinetry is a cost-effective way to update it if you don't like the way it looks. You may have just bought a home with cabinets from decades ago. You can change the appearance of your kitchen by adding thermofoil laminate sheets to your cabinets. If you want to change anything else about your cabinets, such as their size or location, you'll need to get them replaced.
-
You want to sell your house: Refacing your cabinets can improve your home's resale value. A minor kitchen remodel has a return on investment (ROI) of 72.2%, but you can get even more out of your investment if you reface your cabinets yourself. Choose a neutral color that appeals to potential buyers or a luxurious wood finish that adds warmth to your kitchen.
-
You're on a budget: If you want to change the look of your cabinets but don't want to spend a lot of money, refacing them is the way to go. You can save thousands of dollars by refacing them yourself instead of investing in brand-new cabinets.

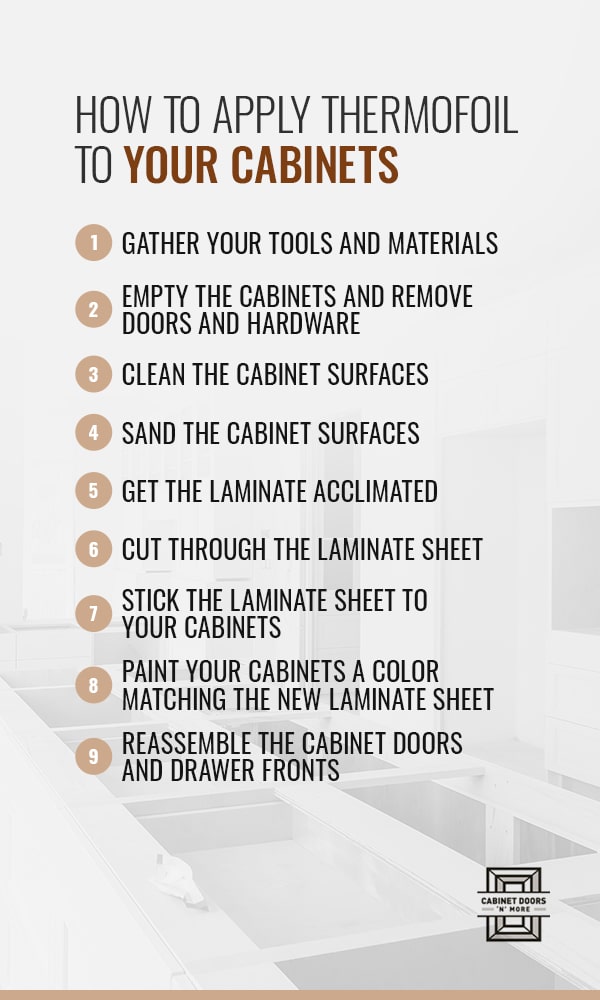
HOW TO APPLY THERMOFOIL TO YOUR CABINETS
You can reface your cabinets yourself by paying close attention to detail. Refacing your cabinets is an acquired skill, but if you have the time and patience to learn, it's can be easy. Make sure you have extra thermofoil laminate sheets on hand in case you make a mistake.
If you've decided to take on this project yourself, you can follow these tips to apply your phenolic thermofoil laminate sheets to your cabinetry.
1. GATHER YOUR TOOLS AND MATERIALS
Before you start installing your thermofoil cabinets, make sure you have the following tools and materials on hand:
- Power drill
- Gloves
- Cleaning solution
- Contact cement or adhesive
- Tape measure
- 3' straight edge
- 150-grit sandpaper or sanding block
- Putty knife
- Utility knife
- Hammer
- Table or circular Saw
- Mini-Vac
- Router (if available)
- Tack cloth
- J-Roller/Wood scraper
- Screwdrivers
- Paintbrushes
- Carpenter square
- Polyurethane wood finish (optional)
- Finishing nails
- New cabinet hardware (if desired)
- Paint rags
- Hardwood plywood
- Wood fillers
- Wood glue
Inspect your cabinetry and decide if you want to replace the hardware. When you order supplies for your refacing materials, you may also want to get new hardware. Browse through our website to find the right products you need for your kitchen.
2. EMPTY THE CABINETS AND REMOVE DOORS AND HARDWARE
Take everything out of your kitchen cabinets, including the shelves and cabinet paper, and put them in a safe spot. Cleaning out your cabinets is an excellent opportunity for you to declutter your space and throw out expired items. Take off your cabinet doors and drawer fronts with a cordless drill. Organize the screws so that you can put on the new cabinet doors and drawer fronts when you're done.
Use the cordless drill to remove the hardware from your drawer fronts and doors, including the drawer pulls and knobs. Put the pieces away safely if you plan on saving them. If you want to get new accessories for your cabinetry, you can throw away or donate your old ones.
3. CLEAN THE CABINET SURFACES
Any paint or finish you put on your cabinetry needs a clean, smooth surface. Remove the residue from the surfaces of your cabinets with a tack cloth and a cleaning solution that removes oils and grease. Wear gloves to protect your hands from the cleaning solution. Follow the manufacturer’s instructions for how to apply it to your cabinets. Rinse with clean, cool water and allow the surface to dry thoroughly.
4. SAND THE CABINET SURFACES
Before you apply the thermofoil to your cabinetry, use wood putty to fill in gaps, cracks and holes you may find on the surface. Lightly sand the cabinetry surfaces where you want to apply the thermofoil, using a sanding block or sandpaper instead of a power sander.
Sand all the exposed surfaces of your cabinets with 150-grit sandpaper. Use a tack cloth to wipe the grit off the surfaces. You may want to use an oscillating sander for large sections of the cabinet. Use a sanding block or sand by hand for smaller areas.
5. GET THE LAMINATE ACCLIMATED
Vinyl is a durable material, but it needs time to adjust to your kitchen's temperature and humidity. Before you install your thermofoil laminate sheets on your cabinetry, remember to place them on a flat surface so they can acclimate to your home's environment. It takes about two days for them to adjust, so plan for a few days ahead before you begin this project.
6. CUT THROUGH THE LAMINATE SHEET
Measure and cut the thermofoil laminate where you want to place it. Use a sharpened utility knife, veneer/laminate slitter or rotary cutter. The strips you create should be about half an inch wider and two inches longer than the width and length of the stiles and rails.
7. STICK THE LAMINATE SHEET TO YOUR CABINETS
You might want to do the stiles first and then apply the sheets to the rails. Place the laminate strips on the cabinets one opening at a time. You might want to use contact cement to apply the product to your cabinetry.
Put the thermofoil laminate sheets on the rails, the horizontal parts of your cabinets, so that they overlap either side of the stile. Line up the join between the two laminate pieces with a carpenter square. Slice through both pieces by running your utility knife along the line. Remove the extra material from the top of the rail, then lift the rail’s edge and cut the sheet from underneath. Create a neat join by smoothing the rail’s edge back into place.
8. PAINT YOUR CABINETS A COLOR MATCHING THE NEW LAMINATE SHEET
After you’ve applied the thermofoil laminate sheets to the cabinets, stain the cabinet doors and drawer fronts with a similar color to match them. Use a paintbrush and allow the stain to dry thoroughly before re-installing them.
Get rid of the residual material with a razor knife and finish the surface with 150-grit sand block or a hand file. You may also want to add a few protective coats of polyurethane wood finish with a paintbrush.
9. REASSEMBLE THE CABINET DOORS AND DRAWER FRONTS
After painting the cabinet doors and drawer fronts and allowing them to dry, it’s time to reattach them to your cabinetry. Situate the doors so that their patterns are all running in the same direction. Put each door hinge a few inches from the top and bottom of the door.
Use a pencil and mark where you’ll put the screw holes on the door. Drill the pilot holes in the door and use wood screws to put the hinges in place. Do the same thing to the hardware on your doors and drawer fronts.

CONTACT CABINET DOORS 'N' MORE FOR 3D LAMINATE THERMOFOIL SHEETS
Cabinet Doors 'N' More has all the products you need to start your cabinet refacing project — whether doing it yourself or hiring a local contractor to help you. For new or replacement cabinet doors, drawer fronts, drawer boxes and all of your cabinet remodeling needs, turn to the leader in the online kitchen cabinetry industry. You can order as little as one cabinet door front for a quick repair, or multiple cabinet components for a larger-scale project. Contact us online or call 1-667-877-8777 to get started today!
LEARN MORE ABOUT CABINET ACCESSORIES & HARDWARE


Marcia L. Leslie
November 07, 2022
Where to buy thermafoil sheets