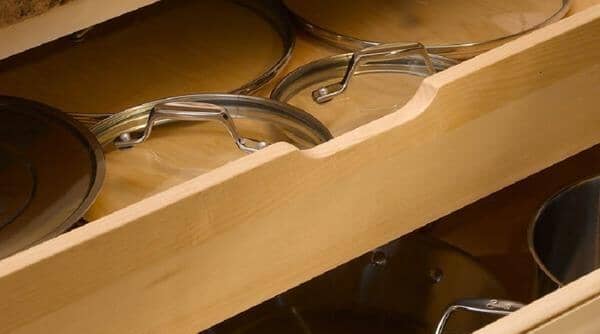
After years of wear and tear — pulling your drawers in and out thousands of times, moving things around from drawer to drawer and filling your drawers with junk until you can't open them — your kitchen drawer boxes can start to look like they've seen better days.
Whether the sides are cracked, the bottom is loose or the corners are damaged, a broken drawer box can disrupt your daily routine by making general storage difficult and causing a lot of frustration. Or, you might just crave a new and refreshed look and decide to upgrade your drawer boxes to modernize certain areas of your home.
Either way, a kitchen drawer replacement is an ideal investment for any homeowner, DIYer or contractor. This guide will help you navigate the process from start to finish. We'll walk you through all the steps of evaluating, measuring, ordering and installing replacement drawer boxes.
HOW TO REPLACE DRAWER BOXES SEAMLESSLY
After you've identified which drawer boxes in your home need to be replaced, you can begin the procurement process. However, before you order your new items, you'll need a proper checklistto ensureyou'rebuying quality products. You should also take the proper measurements to receive the correct size drawer. Then, once you have your new drawers, you can begin the installation process.
Follow these steps when replacing your kitchen drawer boxes.
1. EVALUATE THE CONDITION OF YOUR EXISTING DRAWER BOXES
In the case of damaged drawer boxes, the first step is to carefully inspect the broken drawer to determine the nature and extent of the damage. Not all drawer problems require a full replacement, and sometimes, a simple repair is enough.
Start by identifying which parts of the drawer are affected, such as the front, bottom, corners or side panels. Next, evaluate how severe the damage is. In some cases, you can salvage a broken drawer. Minor cracks or loosened joints on a solid wood drawer may be addressed with wood glue, clamps and a little patience. However, if the wood is warped or disintegrated, replacement is usually the better option.
The material also plays a significant role, and you need to consider whether the drawer is worth repairing. Solid wood tends to be more durable and repairable, while particleboard drawers can be prone to irreparable damage once compromised. In many cases, opting for a new drawer box will provide a sturdier, long-lasting solution that improves the overall quality of your cabinetry.
Remember — you don't have to upgrade the entire room if you need new drawer boxes. When you get replacements, you can keep your old drawer fronts if you prefer, allowing your new boxes to blend in completely with your existing kitchen design. However, homeowners often look into replacing drawer boxes without remodeling the whole room because their drawers have broken or fallen apart.
2. TAKE THE CORRECT MEASUREMENTS
Ensuring precise measurements is essential for a proper fit, but luckily, it's also pretty simple — all you need is a notepad, a pencil and a tape measure. You can start by measuring the existing drawer box carefully and noting its outside width, depth and height. These dimensions should provide a good baseline for the size of your replacement.
Next, measure the cabinet opening where the drawer slides in. The inside width, height and depth of the opening will dictate the maximum size of your drawer. Keep in mind that drawer boxes are generally a bit smaller than the opening to allow smooth operation.
Other important measurements to note include:
The drawer runners or glides: You need to subtract the dimensions of these components from your drawer box measurements. This will prevent the drawer from binding or rubbing inside the cabinet. You also need to measure the kitchen drawer for replacement slides.
The drawer front: If you're planning to reuse your drawer front, it's important to measure it accurately. Most drawer fronts are attached to the drawer box separately, so their dimensions will need to be recorded to ensure a seamless reattachment.
The drawer bottom: It's also important to note the thickness of the drawer bottom, as your next box will need to accommodate it properly.
If your current drawer box includes notches or cutouts for the glides or other hardware, measure the size and placement carefully. Your replacement will need to match or adapt to these features.
If you plan to use undermount glides, the measurements for your drawer box will be slightly different. In this case, be sure to order the "notch and bore" drawer option so the glides fit properly at the back of the drawer.
When upgrading your kitchen drawers, picking the right material is essential. It affects how the drawers look, how long they last and how well they perform. Here are some commonly used materials:
Solid wood: This classic option is known for its strength and natural beauty. It can be painted or stained to match your kitchen's design and tends to hold up well over time.Mostsolid wood drawer boxesarefinished with a clear UV finish that protects the drawers from damage andoffersa nice, completed look. Solid wood is also aneconomical choice — depending on the height, width and depthyou need, new drawer boxes could cost as low as $40-$50.
MDF (medium-density fiberboard): MDF is a dense, smooth material made from wood fibers. It's budget-friendly and great for painted finishes, offering a clean, modern appearance. While it's not as strong as solid wood, it performs well in low-moisture areas.
Thermofoil: A vinyl coating applied to MDF or similar materials is easy to clean and available in a wide range of styles and colors. It provides a sleek look and is a popular choice for contemporary kitchens, though it may not be as heat-resistant as other options.
Balance your decision between appearance, budget and durability. Solid wood is ideal for a long-lasting, classic feel, while MDF and thermofoil are smart picks for modern looks at a lower cost.
4. PLACE YOUR CUSTOM ORDER
After you've taken all the measurements for your drawers, you're all set to buy your new boxes. At Cabinet Doors 'N' More, we make ordering simple. All you have to do is enter the measurements of your drawer, the quantity of new drawers you need and any customizations, such as the "notch and bore" option, and you're ready to order.
We're committed to providing premium drawer boxes at the highest standard of service. If your order consists of only drawer boxes, it will ship within 10 business days. If you purchased other products from us, such as cabinet doors or drawer fronts, we will ship everything in our typical 10-15 business day window.
5. PREPARE FOR INSTALLATION
After you receive your new drawer box, it's time for preparation and installation. If you haven't already done so, begin by removing the old drawer box. This typically involves unscrewing the drawer front from the box, removing the box from the cabinet and detaching any old hardware, such as drawer glides or handles.
Next, prepare your new drawer box for installation. If the drawer front is separate, predrill holes on the new box to match the screw placement of the original, using the old box as a template to ensure alignment. If the new drawer box does not have drawer slides attached, install them according to the manufacturer's guidelines, aligning them perfectly for smooth operation.
We always ship our drawer boxes fully assembled, so you won't need to put your new drawers together. Before you get too far into the installation process, however, you'll want to check to make sure the drawer measurements are correct. Pull out your tape measure again to ensure the height, width and depth of your drawer boxes are all accurate.
6. INSTALL YOUR NEW DRAWER BOXES
After you've verified that your drawers will fit, you can begin the installation process. Replacing a kitchen drawer box can be a little complicated, but if you follow our steps, you'll be finished in no time. If you are using new or existing side-mounted glides, simply follow these four steps for a smooth drawer box installation:
Remove the old drawer box: Once you remove the old drawer box, you'll want to strip all the hardware off it. Remove the side-mounted glides, the drawer front and any other hardware you want to reuse.
Drill pilot holes: For best results, drill pilot holes where you plan to mount the glides on the new drawer.
Mount glides: Using your pilot holes, mount your new or existing glides onto the new drawer box. Because you're attaching these to a real wood box and not a particleboard box, they will stay better secured over time.
Reattach drawer front:Finally, you need to replace the drawer fronts. Attach the drawer front by carefully positioning it against the new box and securing it with screws. Be sure to use screws of the correct length so they do not poke through the panel.If you reuse your existing hardware, reattach it in the same way it was secured before you removed it.
Once assembled, slide the new drawer box back into the cabinet opening, aligning the slides and pushing gently but firmly until it sets fully.
Test the drawer several times, opening and closing it to check for smooth movement and proper fit. Look closely at the alignment of the drawer front with the surrounding cabinetry — if the drawer rubs, binds or feels too tight, or if the front is misaligned, make the necessary adjustments.
Sometimes, loosening the glide screws and shifting their position slightly can fix sliding problems. The same goes for alignment issues — repositioning the drawer front by loosening and retightening its screws often solves the problem.
The installation process will be similar if you're using new undermount glides, but for more detailed information, check out our video on installing undermount glides.
7. TROUBLESHOOT COMMON PROBLEMS
If your drawer doesn't glide smoothly after installation, the most common culprit is misaligned slides or a drawer box that is too wide or uneven. You can try the following potential solutions:
Lubricating metal glides: A silicone lubricant spray can help establish a smooth operation, but the key is ensuring the slides are installed and aligned correctly.
Adjusting screw placements: If the drawer front is crooked or doesn't sit flush with the cabinet, double-check that the drawer box itself is square. Minor adjustments to screw placement can correct these issues.
Sanding down edges: Should the drawer be too tight, sanding down the edges of the box slightly may create the needed clearance. Conversely, if it's too loose, thin shims added to the glides can fill gaps and stabilize the drawer's movement.
GENERAL TIPS FOR A SUCCESSFUL DRAWER BOX REPLACEMENT
Now that you know the basic steps for drawer box replacement, here are some additional tips to keep in mind as you tackle this project:
Remain patient: Patience and attention to detail are your best allies. Rushing measurements or installation can lead to frustrating results.
Purchase the right tools: Before starting, make sure you have the right tools on hand, including clamps, a drill with appropriate bits, a measuring tape, a square and screwdrivers.
Ask questions: If you're uncertain at any stage, don't hesitate to seek help. Sometimes, a second pair of eyes or a more experienced friend can make all the difference.
Prevent damage: Protect your workspace with a drop cloth or scrap wood to prevent damage to your floors or countertops as you work.
By following these detailed steps, you can confidently replace a broken drawer box yourself, restoring your cabinetry's usefulness and beauty. Take on the practical and rewarding home improvement project that will keep your storage functional and visually appealing for years to come!
ORDER NEW DRAWER BOXES WITH CABINET DOORS 'N' MORE
Whether you're completely remodeling your kitchen or you're simply looking to replace a single broken drawer, we can build the top-quality drawer boxesyou need.
Cabinet Doors 'N' More provides the highest-quality assembled drawer boxes in the industry to replace kitchen drawers. Our drawer boxes include the following features:
5/8" natural, solid birch
All drawer boxes are shipped assembled at no extra charge
Classic dovetail construction for long-term durability
1/4" plywood veneer bottom panel for added strength
The entire drawer box is finished with a clear UV finish
If you're ordering only drawer boxes, we can ship in 10 business days. If shipping with other components like Cabinet Doors, Drawer Frontsor accessories, it will be our normal 10-15 business days.